Tutorial
How To Submit AJAX Forms with JQuery

Introduction
jQuery can be paired with form submission to handle validation. This has the benefit of providing users with feedback on any errors in their input.
In this tutorial, you will be presented with a sample form that communicates to a PHP backend. The form will use jQuery to process a form without a page refresh (using AJAX), indicate any errors, and also display a success message.
Deploy your frontend applications from GitHub using DigitalOcean App Platform. Let DigitalOcean focus on scaling your app.
Prerequisites
To complete this tutorial, you will need:
- This tutorial assumes you have PHP installed locally and are able to run the built-in web server. You may be able to consult one of our tutorials for installing PHP in your environment.
- Some familiarity with selectors and methods from the jQuery library.
- Some familiarity with classes from the Bootstrap library.
- A code editor.
- A modern web browser.
Note: This tutorial does not specify the latest versions of jQuery (currently 3.5.1) or Bootstrap (currently 5.0.0-beta1). However, many of the lessons in this tutorial still pertain to the latest versions.
This tutorial was verified with PHP v7.3.24, jQuery v2.0.3, and Bootstrap v3.0.3.
Step 1 — Building the Backend with PHP
For the purposes of this tutorial, the backend will be written in PHP.
First, open a terminal window and create a new project directory:
- mkdir jquery-form-validation
Navigate to this new project directory:
- cd jquery-form-validation
Then, use your code editor to create a new process.php file:
<?php

$errors = [];
$data = [];

if (empty($_POST['name'])) {
    $errors['name'] = 'Name is required.';
}

if (empty($_POST['email'])) {
    $errors['email'] = 'Email is required.';
}

if (empty($_POST['superheroAlias'])) {
    $errors['superheroAlias'] = 'Superhero alias is required.';
}

if (!empty($errors)) {
    $data['success'] = false;
    $data['errors'] = $errors;
} else {
    $data['success'] = true;
    $data['message'] = 'Success!';
}

echo json_encode($data);
This file will take values for name, email, and superheroAlias. If any of these values are not provided, an error message will be sent back. Many other validations could be performed at this point, but for the purposes of this tutorial, you will only be ensuring these required inputs have been provided. Otherwise, if a value for name, email, and superheroAlias are present, a success message will be sent back.
Note: In a real-world scenario, the backend would also be responsible for other tasks such as taking the data and saving changes to a database, creating a session, or sending an email.
Now that you have the form processing completed, you can create the form.
Step 2 — Building the Frontend with HTML and CSS
For the purposes of this tutorial, Bootstrap will be used to build out the views.
In your project directory, use your code editor to create an index.html file:
<!DOCTYPE html>
<html>
  <head>
    <title>jQuery Form Example</title>
    <link
      rel="stylesheet"
      href="//netdna.bootstrapcdn.com/bootstrap/3.0.3/css/bootstrap.min.css"
    />
    <script src="//ajax.googleapis.com/ajax/libs/jquery/2.0.3/jquery.min.js"></script>
</head>
  <body>
    <div class="col-sm-6 col-sm-offset-3">
      <h1>Processing an AJAX Form</h1>

      <form action="process.php" method="POST">
        <div id="name-group" class="form-group">
          <label for="name">Name</label>
          <input
            type="text"
            class="form-control"
            id="name"
            name="name"
            placeholder="Full Name"
          />
        </div>

        <div id="email-group" class="form-group">
          <label for="email">Email</label>
          <input
            type="text"
            class="form-control"
            id="email"
            name="email"
            placeholder="email@example.com"
          />
        </div>

        <div id="superhero-group" class="form-group">
          <label for="superheroAlias">Superhero Alias</label>
          <input
            type="text"
            class="form-control"
            id="superheroAlias"
            name="superheroAlias"
            placeholder="Ant Man, Wonder Woman, Black Panther, Superman, Black Widow"
          />
        </div>

        <button type="submit" class="btn btn-success">
          Submit
        </button>
      </form>
    </div>
  </body>
</html>
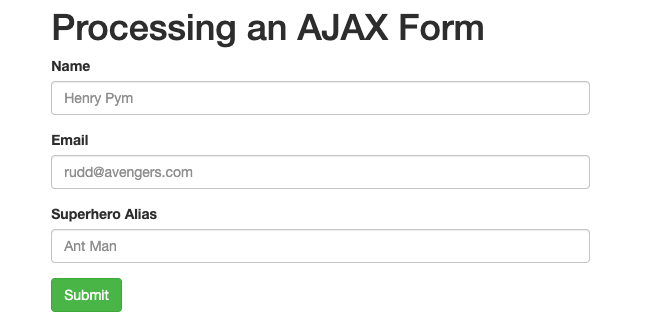
The CDN (content delivery network) version of Bootstrap and jQuery will be referenced. The form’s action will be set to the PHP file that was created earlier. The form will consist of fields for name, email, and superheroAlias. The form will also need a Submit button.
Open a terminal window and navigate to the project directory. And run the PHP server:
- php -S localhost:8000
Visit localhost:8000 in your web browser and observe the following:
Now that you have the form completed, you can create the script to handle form submission.
Step 3 — Handling Form Submit Logic in JavaScript and jQuery
To submit a form via AJAX, your script will need to handle four tasks:
- Capture the form submit button so that the default action does not take place.
- Get all of the data from the form using jQuery.
- Submit the form data using AJAX.
- Display errors if there are any.
In your project directory, use your code editor to create a new form.js file:
$(document).ready(function () {
  $("form").submit(function (event) {
    var formData = {
      name: $("#name").val(),
      email: $("#email").val(),
      superheroAlias: $("#superheroAlias").val(),
    };

    $.ajax({
      type: "POST",
      url: "process.php",
      data: formData,
      dataType: "json",
      encode: true,
    }).done(function (data) {
      console.log(data);
    });

    event.preventDefault();
  });
});
This code retrieves the data from the name, email, and superheroAlias fields. It then performs an AJAX request to process.php with a payload of form data. After a successful connection, the console will log the response data. event.preventDefault() is used to prevent the form from behaving by default by reloading the page on submission.
After saving your changes to form.js, revisit the index.html file with your code editor. Add a reference to the new JavaScript file:
<!DOCTYPE html>
<html>
  <head>
    <title>jQuery Form Example</title>
    <!-- ... -->
    <script src="form.js"></script>
</head>
<!-- ... -->
Now when a user presses the Submit button on the form, the JavaScript code will retrieve all the input values and send a POST request to process.php.
Note: You will be using the .done callback to handle a successful AJAX request. This used to be called .success, but that has since been deprecated in jQuery 1.8+.
Another alternative is to use serialize instead of pulling the form information individually.
The PHP script will process the inputs that the AJAX call sent and return the $data[] array that was created. You can observe this in your browser’s console after you submit your form:

Now that you have the form logic completed, you can create the script to handle form errors.
Step 4 — Displaying Form Validation Errors
In the PHP script, the code checks to ensure that all the fields are required. If a field is not present, an error is sent back.
Revisit form.js and add the following highlighted lines of code:
// ...

    $.ajax({
      type: "POST",
      url: "process.php",
      data: formData,
      dataType: "json",
      encode: true,
    }).done(function (data) {
      console.log(data);

      if (!data.success) {
        if (data.errors.name) {
          $("#name-group").addClass("has-error");
          $("#name-group").append(
            '<div class="help-block">' + data.errors.name + "</div>"
          );
        }

        if (data.errors.email) {
          $("#email-group").addClass("has-error");
          $("#email-group").append(
            '<div class="help-block">' + data.errors.email + "</div>"
          );
        }

        if (data.errors.superheroAlias) {
          $("#superhero-group").addClass("has-error");
          $("#superhero-group").append(
            '<div class="help-block">' + data.errors.superheroAlias + "</div>"
          );
        }
      } else {
        $("form").html(
          '<div class="alert alert-success">' + data.message + "</div>"
        );
      }

    });

    event.preventDefault();
  });
// ...
This code checks to see if the response contains an error for each field. If an error is present, it adds a has-error class and appends the error message.
Now, revisit your form in a web browser and experiment with submitting data with the form.
If there are any errors that come back from the server, the form will provide feedback on any required fields:

And if there are no errors that come back from the server, the form will provide feedback for a successful submission:

Every time we submit the form, our errors from our previous submission are still there. You will need to clear them by removing them as soon as the form is submitted again.
Revisit form.js and add the following highlighted lines of code:
// ...

  $("form").submit(function (event) {
    $(".form-group").removeClass("has-error");
    $(".help-block").remove();

    // ...
  });

// ...
This code will remove the has-error class from all .form-group elements. It will also remove all .help-block elements with error messages.
Step 5 — Displaying Server Connection Errors
If there is an error connecting to the server, there will be no JSON response from the AJAX call. To prevent users from waiting for a response that will never arrive, you can provide an error message for connection failures.
Revisit form.js and add the following highlighted lines of code:
// ...

    $.ajax({
      type: "POST",
      url: "process.php",
      data: formData,
      dataType: "json",
      encode: true,
    })
      .done(function(data) {
        // ...
      })
      .fail(function (data) {
        $("form").html(
          '<div class="alert alert-danger">Could not reach server, please try again later.</div>'
        );
      });

// ...
If the server is broken or down for any reason, a user who attempts to submit a form will get an error message:

Now that you have the server error message complete, you have completed the example form.
Using $.post instead of $.ajax
jQuery also provides a $.post shorthand method as an alternative to $.ajax.
The $.ajax code in form.js could be rewritten with $.post:
$.post('process.php', function(formData) {
  // place success code here
})
  .fail(function(data) {
    // place error code here
  });
The advantage of $.post is it does not require as much connection configuration to be declared.
Conclusion
In this article, you built a sample form that communicates to a PHP backend with jQuery and displays any errors in the form.
As a next step, you will want to explore more complex validations like valid email addresses and dates. You may also be interested in applying client-side validations that work in the browser.
If you’d like to learn more about JavaScript, check out our JavaScript topic page for exercises and programming projects.
Want to deploy your application quickly? Try Cloudways, the #1 managed hosting provider for small-to-medium businesses, agencies, and developers - for free. DigitalOcean and Cloudways together will give you a reliable, scalable, and hassle-free managed hosting experience with anytime support that makes all your hosting worries a thing of the past. Start with $100 in free credits!
author
author
Community Builder
Then: Learned to build the internet on DigitalOcean Community. Now: Building DigitalOcean Community on the internet.
editor
Community Builder
Then: Learned to build the internet on DigitalOcean Community. Now: Building DigitalOcean Community on the internet.
This textbox defaults to using Markdown to format your answer.
You can type !ref in this text area to quickly search our full set of tutorials, documentation & marketplace offerings and insert the link!


Get our biweekly newsletter
Sign up for Infrastructure as a Newsletter.

Hollie's Hub for Good
Working on improving health and education, reducing inequality, and spurring economic growth? We'd like to help.

Become a contributor
Get paid to write technical tutorials and select a tech-focused charity to receive a matching donation.

Hello, can you guide on how to add google recaptcha to the form?
This comment has been deleted
specifically: when I fill out the form (correctly/incorrectly) I can see in the browser console the correct success true/false output, but the form does not deliver the success/fail message, it stays showing the form.
doesn’t seem to work!
This code doesn´t really work anymore: Uncaught ReferenceError: data is not defined is the error at the console. I don´t know why exactly this occurs. I am using php7.4.
Great tutorial! Very helpful!
I ran into one small issue trying to use $.post. If you want to use $.post instead of $.ajax with the code above, you need to add the ‘json’ type after the function:
$.post(‘process.php’, function(formData) { // place success code here }, ‘json’) .fail(function(data) { // place error code here });
Don’t work {“success”:false,“errors”:{“name”:“Name is required.”,“email”:“Email is required.”,“superheroAlias”:“Superhero alias is required.”}}
is not working
Extremely helpful, very simple and concise.
Thanks so much
This is great.
Could you possible include a working example or a download of a build working version?